Basics of Photography in Oro Facial Science and its Applications in Prosthodontics
A.B Shetty Memorial of Dental Sciences, Nitte Univrsity Deralakatte, Mangalore, India
Abstract
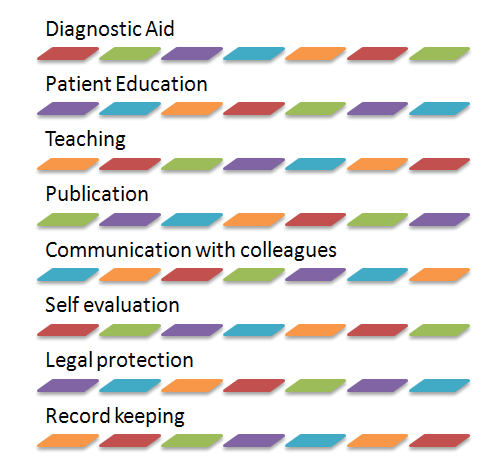
Photography is considered a priceless tool in dental education. Without the proper knowledge or the proper equipment in photography, it is almost impossible to achieve quality results. Clinical photography has its greatest applications as it aids in record -keeping and also as an aid in displaying and conveying information.
Furthermore it proves as an indispensable tool in selfevaluation, patient education, and communication with other colleagues.
This article illuminates the various aspects of dental photography and its use in day to day clinical practice.
KEY WORDS: Dental photography, Clinical photography, Intra-oral views
INTRODUCTION
Photography is an art which is appreciated by many and has paved its way in Dentistry today. Photographs have become an integral part of specialty training programmes and have proved to be an unparalleled tool to assist in the learning process. Today they are used for patient education, group presentations, published illustrations, maintaining records and for displaying an array of cases. It is important to understand how to take proper photographs pertaining to clinical work for diagnostic aid, learning, self- assessment and improvement.
IMPORTANCE OF PHOTOGRAPHS IN DENTISTRY
SELECTION OF EQUIPMENT
Most of the dental specialists today have a fair idea on how to take a photograph. The difference lies in selection of the right equipment. With the recent advances in photography, from manual to digital the decision becomes very complicated. Not only can the wrong choice give poor results, such as distortion of the image’s perspective, poor lighting, lack of lens sharpness but it could also cost a lot of money.
A good camera may not necessarily be an ideal dental clinical camera unit. In quality most camera units are about the same, but the best dental clinical camera is one that will produce the best results in the least time, one which is most versatile at the least cost.
INTRAORAL VIEWS1
An excellent clinical photograph requires a clean and accurate subject area which is visually free of influences such as saliva, poor use of mouth mirrors, retractors or backgrounds. The camera flash is to be properly positioned to provide good contrast and shadow direction. Also, the patient’s position is to be adjusted according to the different views and the operators ease in making the view.
For most straight anterior views, the patient should be seated in a semi upright position with a slight tilt backwards. In a contoured chair, the patient must be turned to the side so the operator does not lean to the side over the chair and the patient. The chair height should be adjusted so the operator is comfortable while taking the picture.
The dental operatory light should not be shone directly onto the teeth as the colour balance shift can be seen on the teeth and tissues. Light is needed only to give enough focus. When the dental operatory light is bright on the side of the arch that should have contrast, it will dim the contrast produced by the flash.
For full mouth views, the focus should be just ahead of half the anteriorposterior distance. This is considered to be the cuspid midline to first bicuspid midline. The depth of field at this point of focus will produce anterior-posterior sharpness.
Objects such as retractors, mirror edges, fingers and also the patient’s lips should be excluded from the frame when not needed in the scene. The camera lens is set for an accurate f-opening (f/22) to focus on the six anterior teeth.

For general views, two plastic lip retractors should be used. The retractor on the same side of the mouth as the flash should be extended more than the other side to prevent a shadow on the posterior teeth.
OPERATOR POSITIONING FOR INTRAORAL VIEWS
Adjust the camera to the patient’s position to minimize movement of the camera. Operators arms are to be kept close to the body or the elbow is rested on steady support. The camera is moved back away from the centrals until they are out of focus, then moved forward and focussed on the cuspid or first bicuspid.
The flash for all intra oral views should be on one side of the lens. 9 or 10 o’clock or 2 or 3 o’ clock views should be used but seldom the 12 o’clock view except for a direct view under the tongue.
INTRAORAL LIGHTING AND CONTRAST1
The flash should be positioned on the correct side of the lens to produce some shadow. This provides the subject with some form and texture. The flash is generally not used in the 12 o’ clock position as it produces shadows from the upper gingiva or the oral cavity. If the flash is mounted facing one arch of the patient, the opposite will show more contrast into the proximal spaces with the mesial portions being more illuminated than the distal portions on each tooth.
RETRACTORS1
It is advisable to use two retractors at a time, unless the area of importance is being covered by the retractor itself. Using two retractors facilitates better illumination. If the patients mouth is very small and the lips tight, a single retractor can be used for right or left buccal views, then a small retractor can be used on the other side just enough to keep the lips apart to allow light for illumination. The smaller retractor can be replaced using a tongue blade, mouth mirror or two gloved fingers.
Cleft lips almost always require modified retractors for intraoral photography. A very small retractor maybe necessary due to the lip being tight with very
little elasticity in these cases.
Often the retractors are placed on the lip, and the patient or assistant is asked to retract by pulling the handles back towards the ears. This should be avoided as the buccal mucosa is pressed back onto the buccal surfaces of the teeth if not held out or pulled slightly forward. This does not provide good illumination for posterior teeth and is also uncomfortable for the patient as the retractors are pressed against the gingiva.
Retractors or the lips should not be included in the camera view if they can be eliminated. To view the maxillary arch with a mirror, the patients head is tilted upwards slightly so that the camera may view the arch at about 45° angle in the mirror.
For direct viewing of the maxillary arch, the patients head is bent back so that it can be viewed in the camera on a flat plane. This position may be uncomfortable for the patient but it allows good photography from a lower camera position.
For viewing the mandibular arch, the head should be upright with the lower lip retracted downwards for a direct view. Focus should be midway in the arch.
MIRRORS1
Mirrors that are rhodium plated on one or both sides are preferred. The same mirror can be used for the maxillary and the mandibular arches. The mirror should be about 1 to 1 1/8 inches wide and long enough to help visualize until the third molar. The mirror should always be placed distally to the area to be viewed and should be held at 45°to the buccal surfaces of the teeth. The only image that should be viewed is that of the teeth from half of the cuspid up to the last tooth in the arch.
Care should be taken to centre the teeth well in the image. If the mirror is rotated and not parallel, the view will show more of the cusps or more of the gingiva.
PLACEMENT OF MIRRORS
Maxillary arch
For the maxillary arch the patient is asked to tilt their head back slightly. Two plastic retractors are placed and can be held by the patient while the dental assistant can warm the mirror to prevent fogging. The assistant is asked to hold the anterior edges of the mirror between the thumb and the first or second finger. The distal cusps of the last tooth is where the posterior portion of the mirror is made to rest while being centred in the arch and held at 45° angle. To visualize the lingual surface of the anterior teeth, the mirror can be
held as previously described but should be placed one tooth distally to the one wanted in the view.
Mandibular arch
The same procedure is advocated in the mandible except that the head must be tilted back far enough to allow the arch to be almost parallel to the floor when the mouth is opened wide.
FACIAL VIEWS1
For facial views, the camera is held vertically, the flash must be positioned at the top of the lens at the 12 o’ clock position. If the person’s right profile is facing the camera, the flash must be on the right side. The flash above the lens may cause a shadow to form from the nose and the chin. For a frontalview, the head measures up to 8 inches from on ear tip to the other on average. From nose tip to the back of the head the measurement is about 9 inches. Keeping this in mind it is necessary to eliminate about 1 ½ - 2 inches of the back of the head to keep both frontal and profile views of the same proportion.
The patient should stand 10 – 12 inches from a white or light coloured matter surface background. In case the hair length is shorter than the ears there will be a soft shadow below each ear in the image. To eliminate this it may be necessary to use a second flash in the background for which the patient will be required to stand 2 – 3 feet away from the background. The second flash should be angled up to the wall to illuminate the back of the head.
When the background light is not strong enough, a longer shutter exposure is necessary despite flash being used. The longer shutter exposure may burn out the background shadow but due to a slower speed may cause a blur if the patient moves after the flash has gone off. To make frontal or profile views, the dentist should aim the centre of the lens 1 – 1 ½ inches above the pupil of the eye. Looking either up or down to a great degree may cause distortion of the patient’s features. Photographs taken in a dental chair usually yield poor results as there is no background and the floor, wall or chair headrest maybe be visualized. Black or dark backgrounds should be avoided as dark hair will blend into the background
and leave only the face visible.
To take a profile view, the patient’s face is rotated about 3°- 5° back towards the camera lens. This can also be achieved by shifting the camera to the side so that the lens is pointed to the corner of the eye rather than at the ear.
BACKGROUND AND LIGHTING FOR OBJECTS1
Practitioners need to photograph small objects such as impressions, casts, and larger objects such as articulators. Instead of using whatever piece ofcloth, paper or tabletop that is handy care must be taken to choose the right background based on the texture of the background and the colour. Generally is a paper is used, it is curved to form a floor and then gently raised to a curve to form the backdrop. The gentle curve eliminates the line of horizon.
For direct anterior views of casts, the material curves down the front of the table for 2 – 3 inches after which it is taped flat to the top of the table with the gentle curve to form the back wall. The camera lens is lined up along the cusps of the teeth, while the surfaces of the background blend together for a smooth clean background.

Black backgrounds may be used for white casts or others; in such conditions usually a suede finish paper is preferred. Black backgrounds should be jet black only and not black – grey.
When taking photographs of burs or other instruments, paper without texture is preferred. For full mouth casts, where a coloured background is indicated, crepe paper can be stretched to get rid of the wrinkles and is taped down.
Cloth generally does not make for a good background as it has too much texture. The background should be smooth and free of wrinkles, because they steal focus from the object when enlarged on a bigger screen.
PHOTOGRAPHS OF METAL OBJECTS OR INSTRUMENTS1
Prior to taking a picture of the metal object, the practitioner should decide if the porosity or texture of it is important or the smooth gloss of its metal surface is of interest. Both these properties cannot be highlighted in the same view.

For less contrast on metal, the objects can be sprayed with a matte or dulling spray which can be washed off any object when needed. This spray might not be suited for smaller instruments such as burs or instrument points as it lays a satin finish on the metal, however it can be used on larger objects.
DISCUSSION
Basics of photography should be kept in mind for precise and quality documentation. There are wide ranges of applications of photography in Prosthodontics. Photography proves to be a useful tool in complete denture cases. With the help of pre- extraction photographs it helps clinicians select teeth based on the various parameters such as size, shape, form and colour of the teeth used in the denture. Any observed malocclusion, crowding or diastema can be recreated in the final denture based on preoperative photographs.
For cases involving fixed partial dentures, photographs can help clinicians as well as lab personnel in characterization of the definitive prosthesis. Photographs can help us assess the shade of the teeth and of the gingiva; they can also help in providing texture to the teeth as they are built in ceramic.
Smile designing should always include an evaluation of the facial as well as dental compositions.2 A multitude of factors have to be considered such as location and alignment of teeth and the position of the midline, the degree of tooth to be displayed etc. Photography helps us assess these factors.
With the help of photographs we can establish facial or asymmetry in cases requiring maxillofacial prosthesis. Having preoperative photographs can help us gauge the structures on the contralateral side of the face and fabricate an esthetic and accurate prosthesis. In conditions where the patient is missing structures from both the sides of the face, earlier photographs can help clinicians design the prosthesis as well as shade matching.
For full mouth rehabilitation, photographs can provide guidance to fabricating provisional restorations, adjusting the increase in vertical height and observing the function and esthetics of the patients bite.
Planning dental implant therapy for patients can be greatly enhanced due to radiographs. Photographs can be taken prior to implant treatment to assess the clinical aspect of the surgical site, and also of the radiographs to evaluate the bone level. These photographs can be compiled with subsequent photographs of the case for record keeping and to weigh the success of treatment.
Earlier clinicians had to wait for the developed film to arrive to know if the photograph was taken well, but with modern advances in digital cameras that problem is eliminated. Dentists can easily take a photograph and view its accuracy, they can save, store and transfer files with ease. Clinicians can now view the pictures immediately and can retake the photo in case it does not meet the required needs. SLR cameras have since taken the world of photography by storm and provided clarity that can aid the clinician in achieving excellence. A variety of cameras are available in the market today, however the wrong decision in choosing the right camera could not only produce bad photographs but could also prove to be expensive. Digitalcameras today have increased resolution, improved antidust technology, and added versatile flash accessories for macro imaging.3
Photographs provide an honest outlook and help each clinician become self - critical and aware on how to improve. Constant self - evaluation is simplified by photography and along with careful documentation it can contribute to achieving excellence in technical aspects. It is not until you have experience with using a camera that you can assess the clinical worth of the photograph. At least two or more views must be made in relation to posterior points which are difficult to access. Care must be taken to eliminate all foreign bodies and saliva from the site of concern.
CONCLUSION
Photography is a major educational and documentary tool in the field of dentistry today. Photographic documentation of cases can help not only professionals but also aid in learning and improvement in the graduate and post graduate courses. It provides us with unparalleled opportunities for keeping accurate records and conveying information to students, faculty,
patients and colleagues.
REFERENCES
- Freehe C. L , Photography in dentistry : Equipment and Technique, Dental clinics of North America, Vol 27, No. 1 January 1983.
- Kokich VO, Jr, Kiyak HA, Shapiro PA. Comparing the perception of Dentist and Lay people to altered Dental Esthetics. J Esthet Dent. 1999;11:311–24.
- Shagam J, Kleiman A. Technological updates in dental photography – Review article. Dental Clinics of North America, Volume 55, Issue 3, July 2011, Pages 627-633.
Disclaimer from Guident
The views and opinions expressed in articles published in Guident are solely those of the authors and do not necessarily reflect the views of the editors, the editorial board or the publisher, Ivory India. Guident does not endorse any product, technique or treatment described. Clinical content is intended for qualified dental and medical professionals and is not a substitute for individual clinical judgement. Guident, its editors and the publisher accept no liability for any consequence arising from the use of information published in the journal.
How to cite this article
Dr. Krishna Prasad D., Dr. Anupama Prasad D., Dr. Curie Colaco Department of Prosthodontics. Basics of Photography in Oro Facial Science and its Applications in Prosthodontics. Guident. 2014 Dec;8(1). Available from: https://ivoryindia.in/articles/prosthodontics/basics-of-photography-in-oro-facial-science-and-its-applications-in-prosthodontics.html